镜像构建集成
简介
从业务代码到最终的应用,其中不可或缺的一步就是构建镜像。本文将详细介绍如何在 KubeVela 中完成从代码到镜像构建、镜像推送以及应用部署的全过程。
如何使用
使用独立工作流
KubeVela 在 v1.6 版本中引入了独立的工作流,可以用于串联 CI 步骤与应用部署间的流程。与 KubeVela 应用内的工作流不同的是,独立工作流的发布是一次性的,它不对资源做管理,即使删除流水线也不会删除创建出来的资源。
提示
请确保你已经使用 vela addon enable vela-workflow 开启了独立工作流插件。
部署如下工作流:
apiVersion: core.oam.dev/v1alpha1
kind: WorkflowRun
metadata:
  name: build-push-image
  namespace: default
spec:
  context:
    image: my-registry/test-image:v2
  workflowSpec:
   steps:
    # 你也可以使用 kubectl create secret generic git-token --from-literal='GIT_TOKEN=<your-token>' 直接创建 Git 秘钥
    - name: create-git-secret
      type: export2secret
      properties:
        secretName: git-secret
        data:
          token: <git token>
    # 你也可以使用 kubectl create secret docker-registry docker-regcred \
    # --docker-server=https://index.docker.io/v1/ \
    # --docker-username=<your-username> \
    # --docker-password=<your-password>
    # 直接创建镜像仓库秘钥
    - name: create-image-secret
      type: export2secret
      properties:
        secretName: image-secret
        kind: docker-registry
        dockerRegistry:
          username: <username>
          password: <password>
    - name: build-push
      type: build-push-image
      inputs:
        - from: context.image
          parameterKey: image
      properties:
        # 你可以在 kanikoExecutor 字段中指定你的 kanikoExecutor 镜像,如果没有指定,默认使用 oamdev/kaniko-executor:v1.9.1
        # kanikoExecutor: gcr.io/kaniko-project/executor:latest
        # 你可以在 context 中指定 git 和 branch,或者直接指定完整的 context,请参考 https://github.com/GoogleContainerTools/kaniko#kaniko-build-contexts
        context:
          git: github.com/FogDong/simple-web-demo
          branch: main
        # 注意,该字段会被 inputs 中的 image 覆盖
        image: my-registry/test-image:v1
        # 指定 dockerfile 路径,如果没有指定,默认会使用 ./Dockerfile
        # dockerfile: ./Dockerfile
        credentials:
          image:
            name: image-secret
        # buildArgs:
        #   - key="value"
        # platform: linux/arm
    - name: apply-app
      type: apply-app
      inputs:
        - from: context.image
          parameterKey: data.spec.components[0].properties.image
      properties:
        data:
          apiVersion: core.oam.dev/v1beta1
          kind: Application
          metadata:
            name: my-app
          spec:
            components:
              - name: my-web
                type: webservice
                properties:
                  # 注意,该字段会被 inputs 中的 image 覆盖
                  image: my-registry/test-image:v1
                  imagePullSecrets:
                    - image-secret
                  ports:
                    - port: 80
                      expose: true
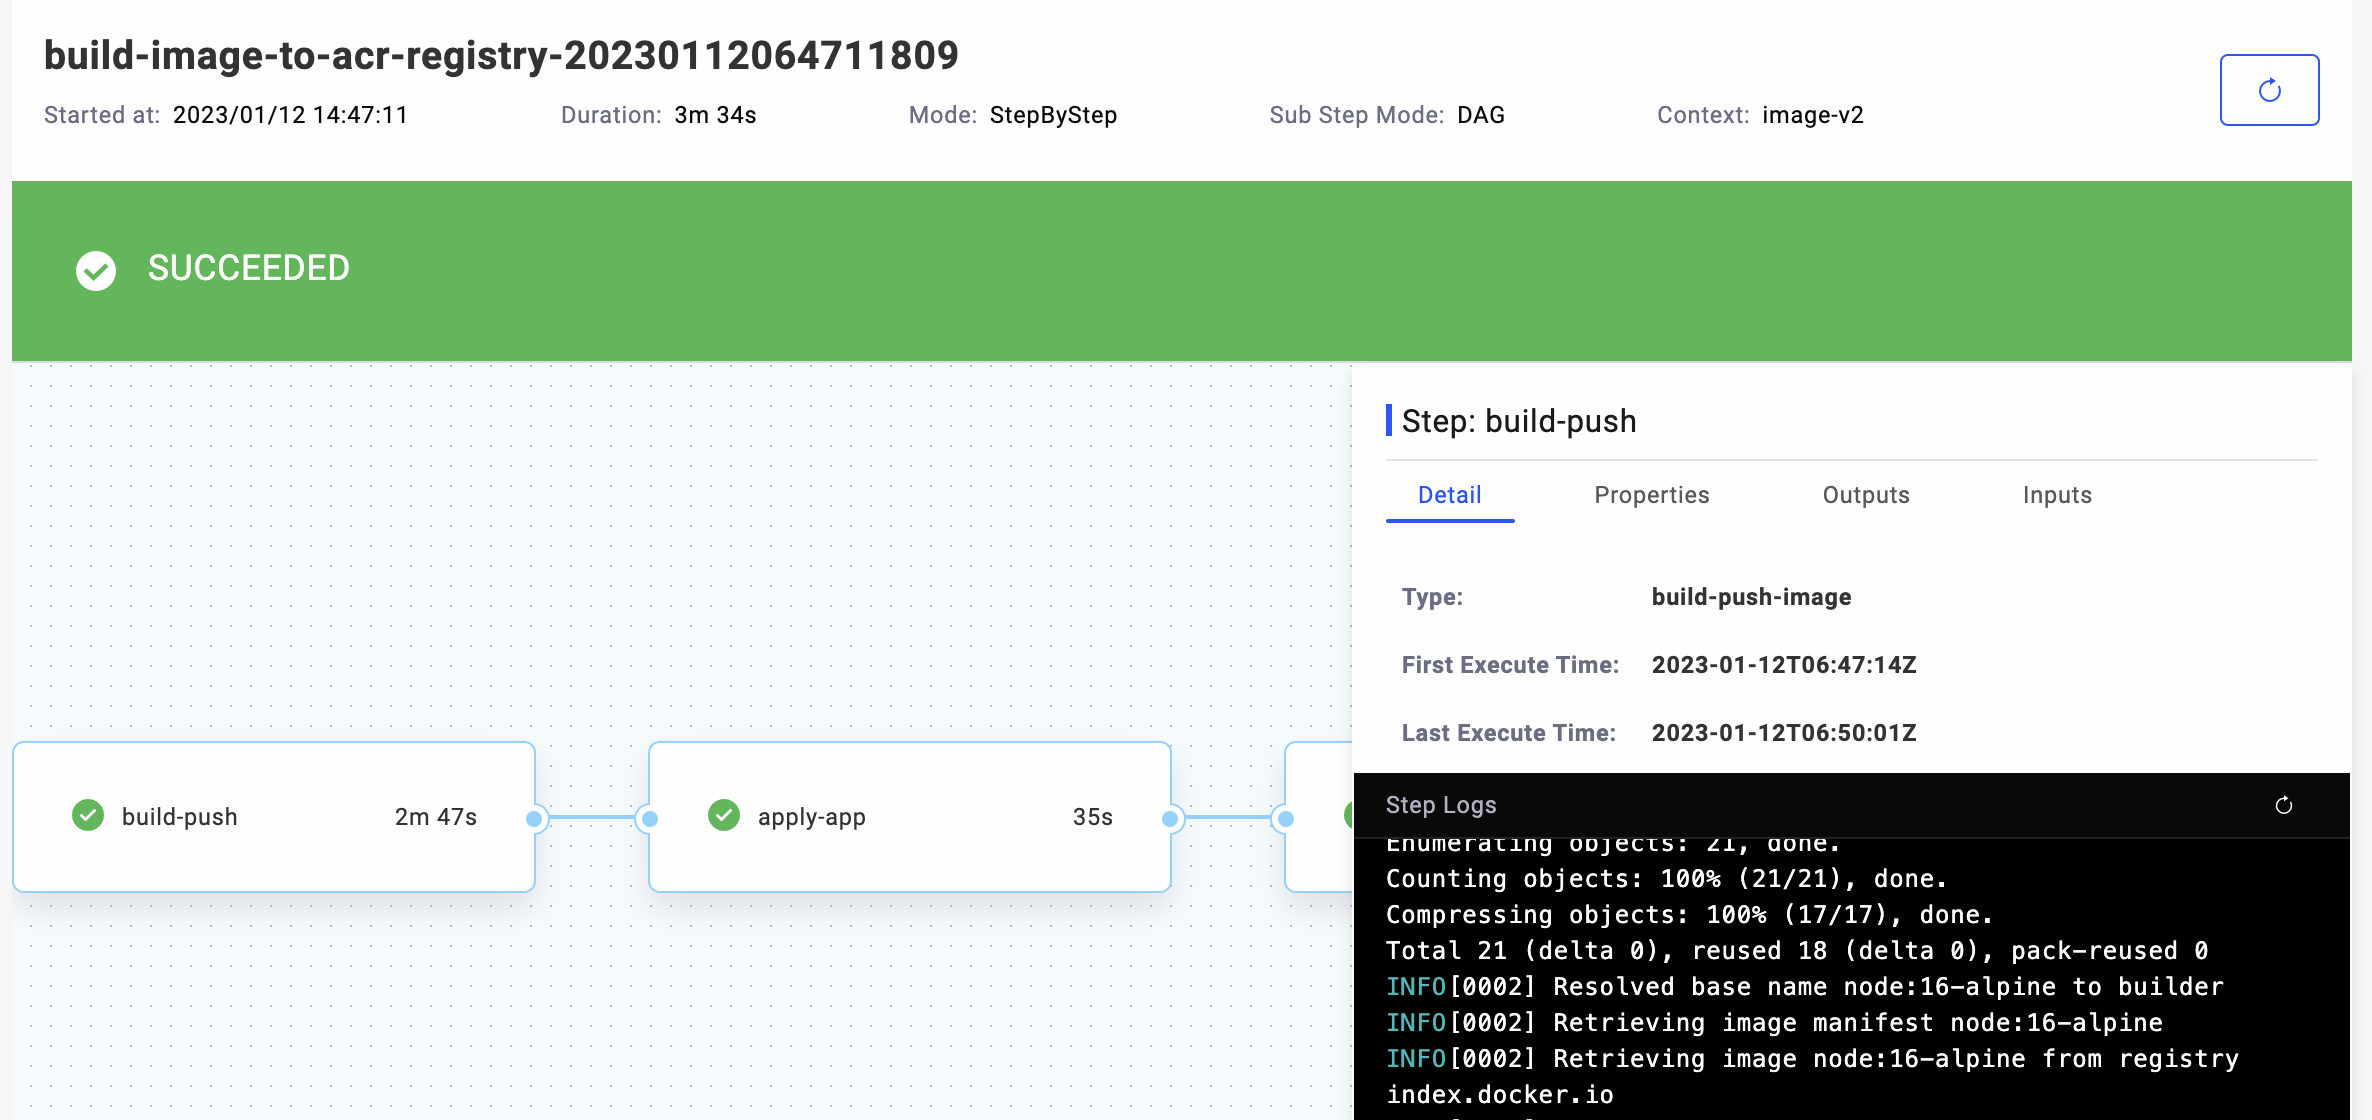
该工作流总共有四个步骤:
- 创建带有 Git 秘钥的 Secret,用于拉取私有仓库的代码来构建镜像。如果你的仓库是公开的,可以跳过这一步。你也可以跳过这一步,使用
kubectl create secret generic git-token --from-literal='GIT_TOKEN=<your-token>'命令来创建秘钥。 - 创建带有镜像仓库秘钥的 Secret,用于将镜像推送至你的镜像仓库。你也可以跳过这一步,使用
kubectl create secret docker-registry docker-regcred --docker-server=https://index.docker.io/v1/ --docker-username=<your-username> --docker-password=<your-password>命令来创建秘钥。 - 使用
build-push-image步骤类型来构建并推送镜像,该步骤会使用指定的 Git 地址及其分支中的代码来构建镜像,你也可以显示指定构建的 context 信息。这个步骤底层会使用 Kaniko 进行镜像构建,在构建的过程中,你可以使用vela workflow logs build-push-image --step build-push来查看步骤的日志。值得注意的是,这个步骤有一个来源于context.image的 inputs,这个 inputs 将覆盖 properties 中的 image 字段。可以看到,当前我们在 context 中声明了image: my-registry/test-image:v2。当我们需要复用这条工作流来构建新的镜像版本时,只需要更新 context 中的数据,就能够更新整个流程。 - 最后一步中将使用
context.image中的镜像版本来发布应用,当应用启动后,你可以使用vela port-forward my-app 8080:80来查看应用的效果。
如果你是在 VelaUX 的 Pipeline 中配置的流程,你可以直接在页面中看到所有步骤的状态和顺序,包括步骤的日志、输入输出等。

在应用中构建镜在应用中构建像,并将新构建的作为组件的镜像,部署如下应用:
apiVersion: core.oam.dev/v1beta1
kind: Application
metadata:
  name: build-push-image
  namespace: default
spec:
  components:
  - name: my-web
    type: webservice
    properties:
      image: my-registry/test-image:v1
      ports:
        - port: 80
          expose: true
  workflow:
    steps:
    - name: build-push
      type: build-push-image
      properties:
        # 你可以在 kanikoExecutor 字段中指定你的 kanikoExecutor 镜像,如果没有指定,默认使用 oamdev/kaniko-executor:v1.9.1
        # kanikoExecutor: gcr.io/kaniko-project/executor:latest
        # 你可以在 context 中指定 git 和 branch,或者直接指定完整的 context,请参考 https://github.com/GoogleContainerTools/kaniko#kaniko-build-contexts
        context:
          git: github.com/FogDong/simple-web-demo
          branch: main
         # 请确保此处 image 字段与 Component 中的 image 相同
        image: my-registry/test-image:v1
        # 指定 dockerfile 路径,如果没有指定,默认会使用 ./Dockerfile
        # dockerfile: ./Dockerfile
        credentials:
          image:
            name: image-secret
        # buildArgs:
        #   - key="value"
        # platform: linux/arm
    - name: apply-comp
      type: apply-component
      properties:
        component: my-web
在上面这个应用中,工作流中的的第一步会使用 build-push-image 步骤来构建镜像,而第二步则会使用新构建的镜像来部署组件。