Use Nocalhost and KubeVela for cloud debugging and multi-cluster hybrid cloud deployment
With the rapid development of cloud-native, how can we use cloud to empower business development? When launching applications, how can cloud developers easily develop and debug applications in a multi-cluster and hybrid cloud environment? In the deployment process, how to make the application deployment have sufficient verification and reliability?
These crucial issues are urgently needed to be resolved.
In this article, we will use KubeVela and Nocalhost to provide a solution for cloud debugging and multi-cluster hybrid cloud deployment.
When a new application needs to be developed and launched, we hope that the results of debugging in the local IDE can be consistent with the final deployment state in the cloud. Such a consistent posture gives us the greatest confidence in deployment and allows us to iteratively apply updates in a more efficient and agile way like GitOps. That is: when new code is pushed to the code repository, the applications in the environment are automatically updated in real time.
Based on KubeVela and Nocalhost, we can deploy application like below:
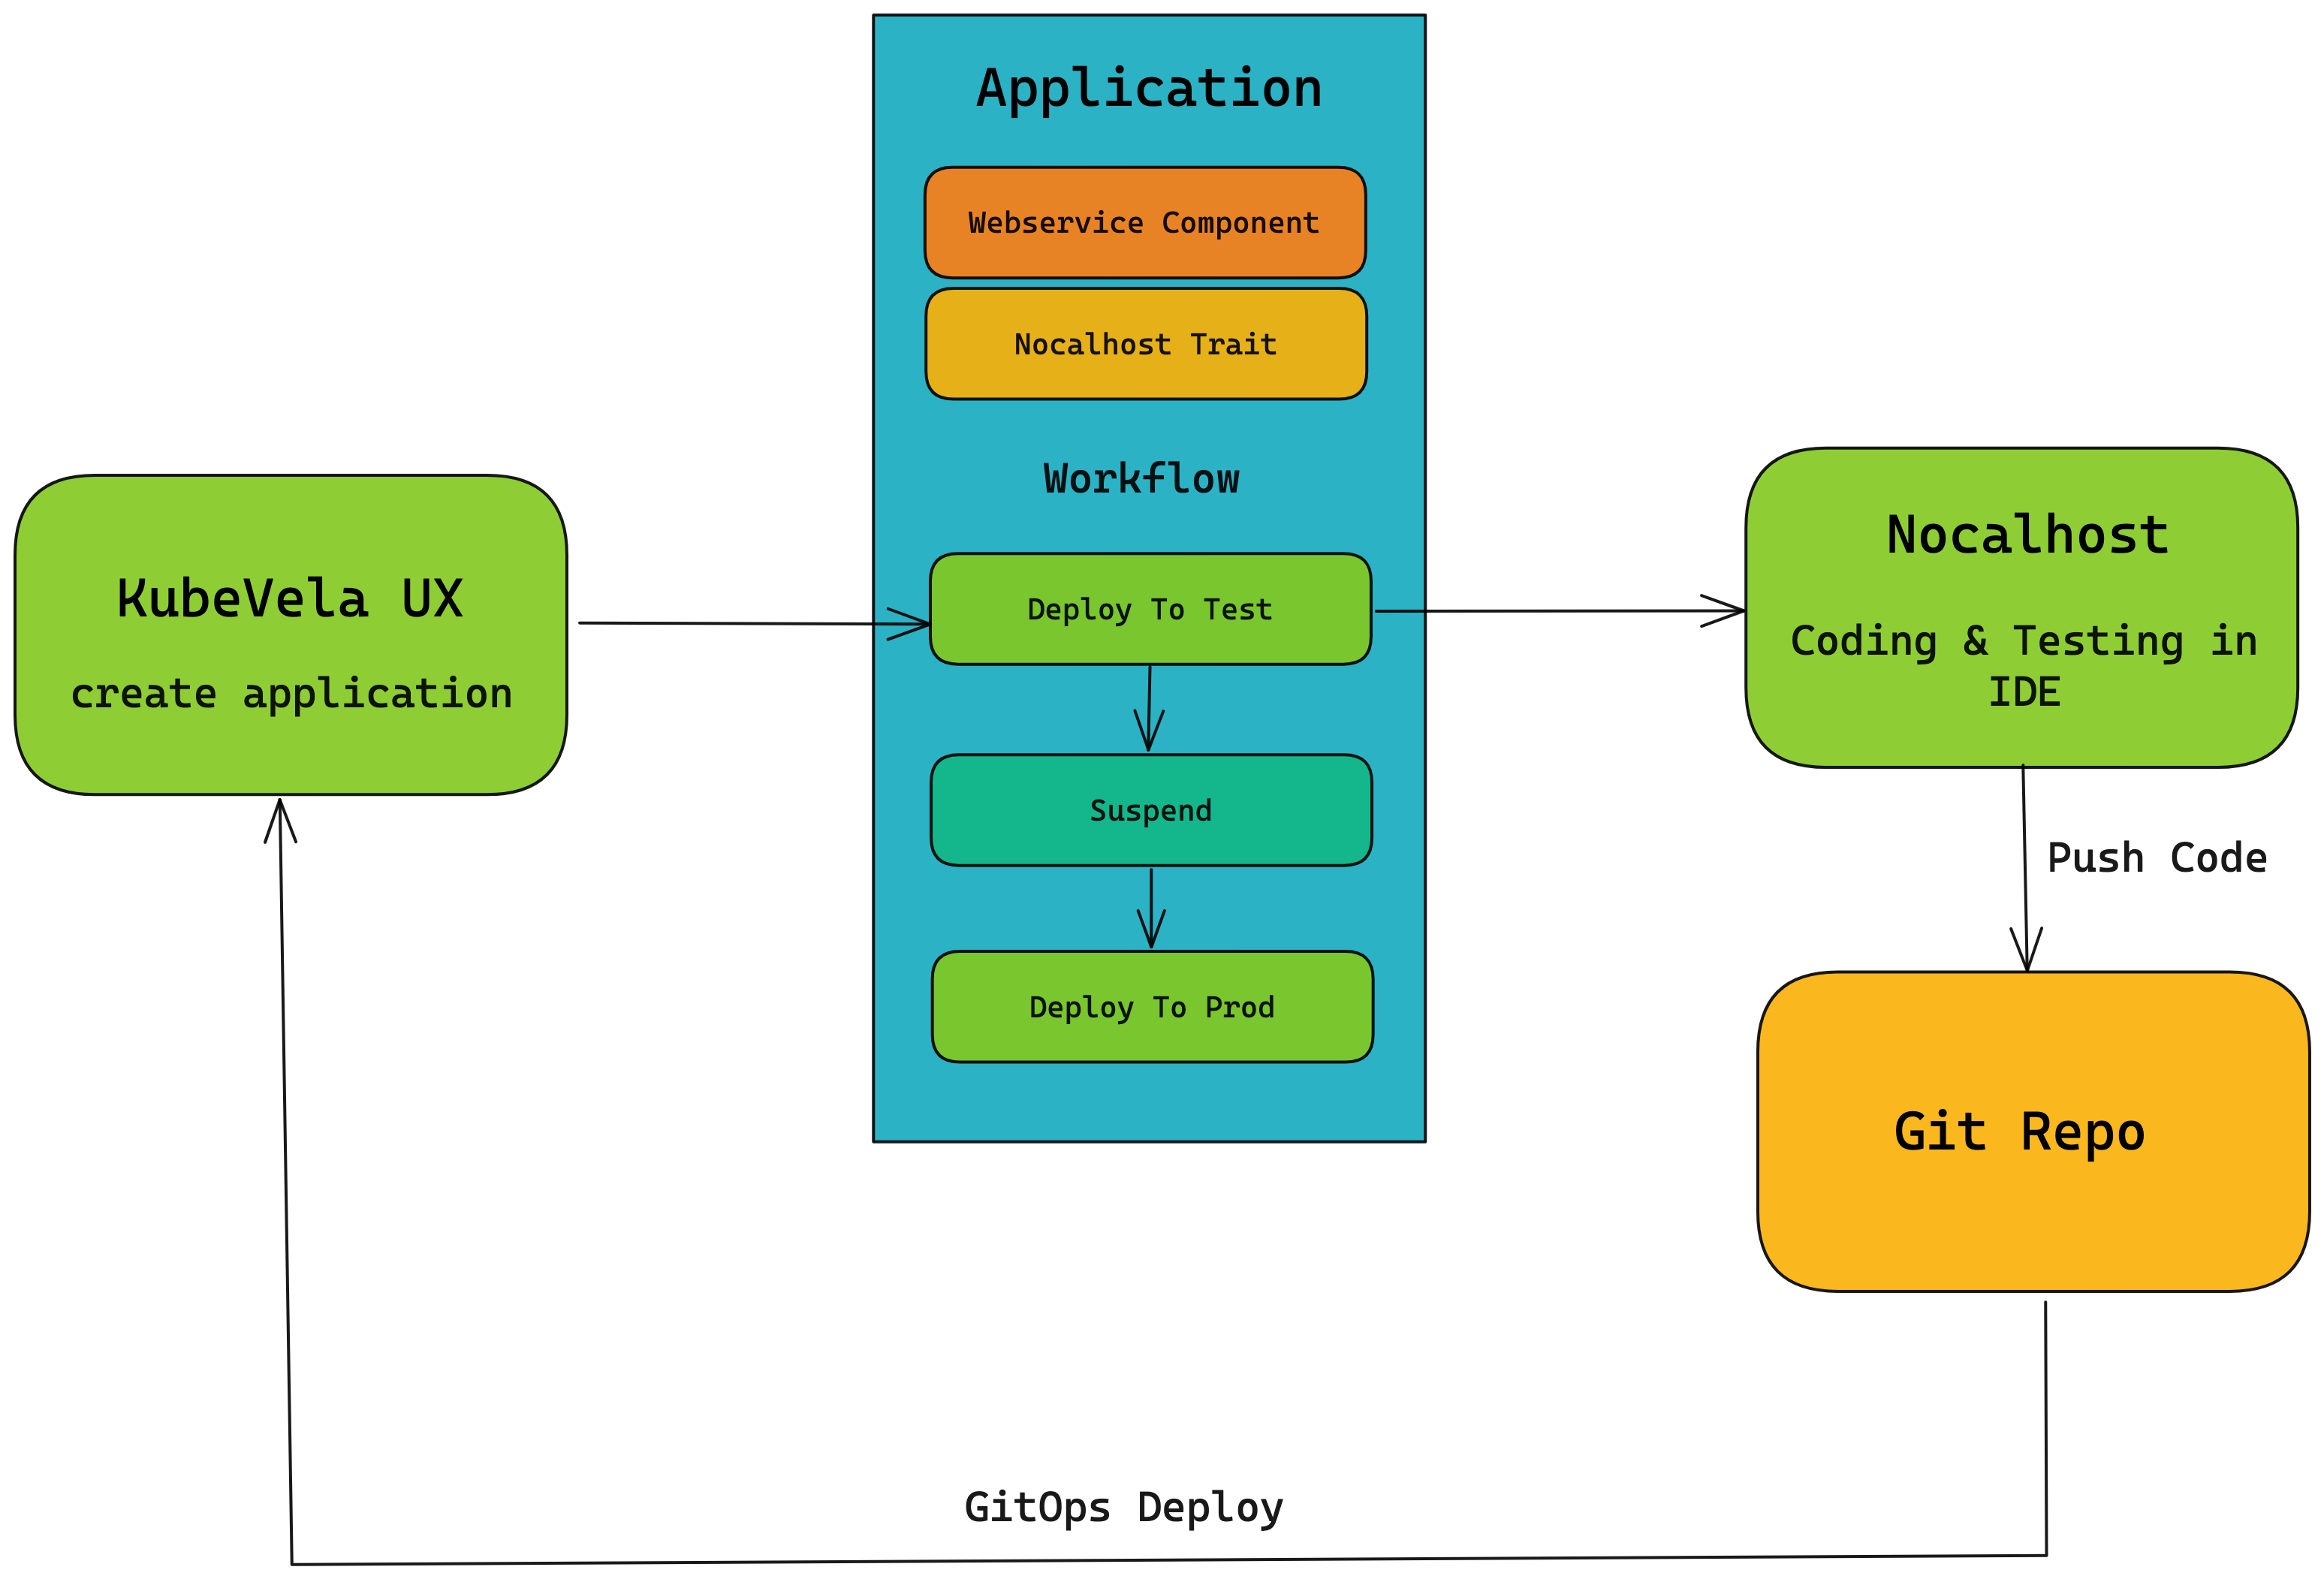
As shown in the figure: Use KubeVela to create an application, deploy the application to the test environment, and pause it. Use Nocalhost to debug the application in the cloud. After debugging, push the debugged code to the code repository, use GitOps to deploy with KubeVela, and then update it to the production environment after verification in the test environment.
In the following, we will introduce how to use KubeVela and Nocalhost for cloud debugging and multi-cluster hybrid cloud deployment.
What is KubeVela
KubeVela is an easy-to-use and highly scalable application delivery platform built on Kubernetes and OAM. Its core capability is to allow developers to easily and quickly define and deliver modern microservice applications on Kubernetes without knowing any details related to Kubernetes itself.
KubeVela also provides VelaUX, which can visualize the entire application distribution process, making the process of application easier.
KubeVela provides the following capabilities in this scenario:
- The full GitOps capability:
- KubeVela supports both Pull mode and Push mode for GitOps: we only need to push the updated code to the code repository, and KubeVela can automatically re-deploy applications based on the latest code. In this article, we will use GitOps in Push mode. For GitOps support in Pull mode, you can check this article.
- Powerful workflow capabilities, including cross-environment (cluster) deployment, approval, and notification:
- With its workflow capabilities, KubeVela can easily deploy applications across environments, and supports users to add workflow steps such as manual approval and message notification.
- Application abstraction capabilities, make developers can understand, use and customize infrastructure capabilities easily:
- KubeVela follows OAM and provides a set of simple and easy-to-use application abstraction capabilities, enabling developers easy to understand application and customize infrastructure capabilities. For example, for a simple application, we can divide it into three parts: components, traits and workflow. In the example in this article, the component is a simple FE application; in the traits, we bind the Nocalhost trait to this component, so that this component can use Nocalhost to debug in the cloud; In the workflow, we can first deploy this component in the test environment, and automatically suspend the workflow, then deploy to the production environment until the manual verification and approval are passed.
What is Nocalhost
Nocalhost is a tool that allows developers to develop applications directly within a Kubernetes cluster.
The core capability of Nocalhost is to provide Nocalhost IDE plugins (including VSCode and Jetbrains plugins) to change remote workloads to development mode. In development mode, the container's image will be replaced with a development image containing development tools (e.g. JDK, Go, Python environment, etc.). When developers write code locally, any changes will be synchronized to the remote development container in real time, and the application will be updated immediately (depending on the application's hot reload mechanism or re-running the application), and the development container will inherit all the original workload's configurations (ConfigMap, Secret, Volume, Env, etc.).
Nocalhost also provides: debug and HotReload for VSCode and Jetbrains IDE; the terminal of the development container in the IDE to obtain a consistent experience with local development; a development space and mesh development space based on Namespace isolation. In addition, Nocalhost also provides a server side to help enterprises manage Kubernetes applications, developers and development spaces, so that enterprises can manage various development and testing environments in a unified way.
In the process of using Nocalhost to develop Kubernetes applications, image building, updating image versions, and waiting for the cluster to schedule Pods is eliminated, and the code/test/debug cycle is reduced from minutes to seconds.
Debug application in the cloud
Let's take a simple front-end application as an example. First, we use VelaUX to deploy it in the multi-environment.
If you don't know how to enable KubeVela's VelaUX addon, please check the official documentation.
Use VelaUX to deploy application
Create an environment in VelaUX, each environment can have multiple delivery targets, let's take an environment which contains a test and production delivery targets as an example.
First, create two delivery targets, one for test and one for production. The delivery target here will deliver resources to the test and prod namespaces of the local cluster respectively. You can also add new clusters for deployment through VelaUX's cluster management capabilities.

After creating the delivery targets, create a new environment which contains these two delivery targets.

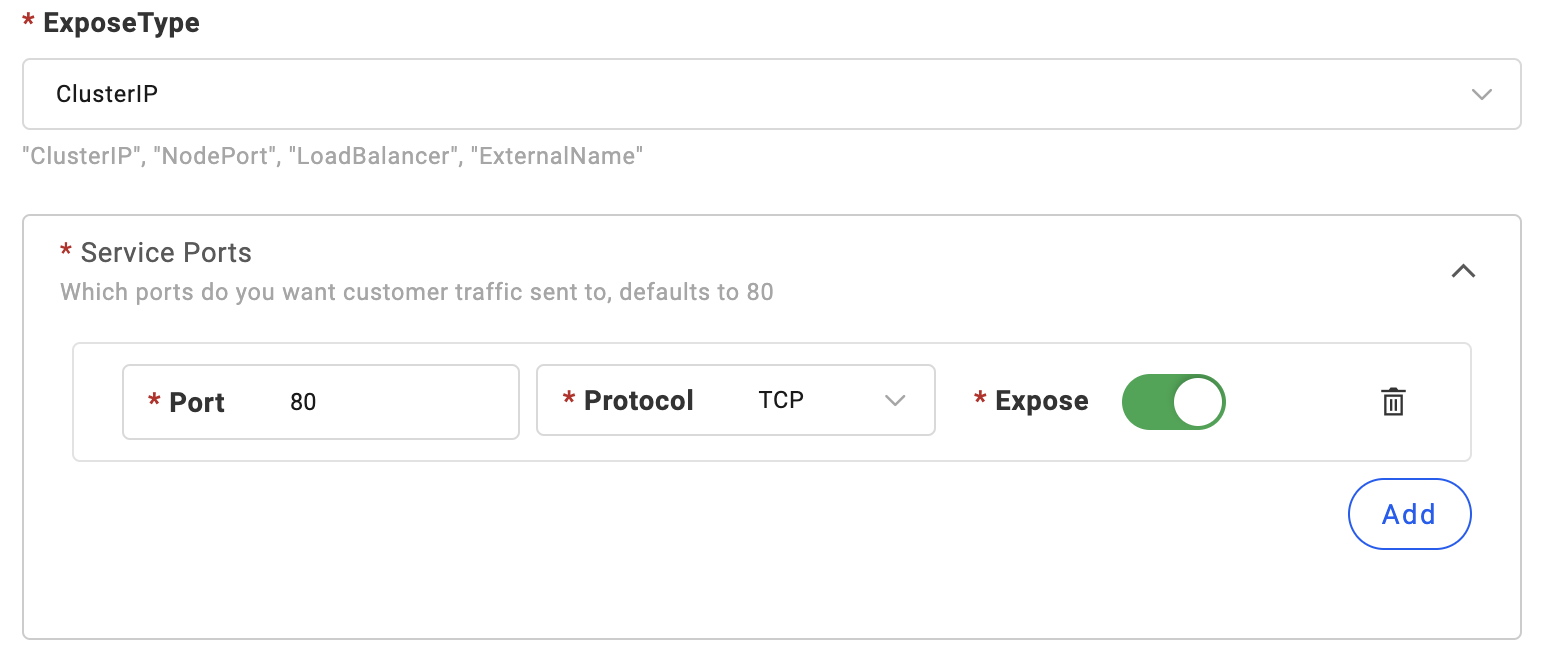
Then, create a new application for cloud debugging. This front-end application will expose services on port 80, so we open port 80 for this application.
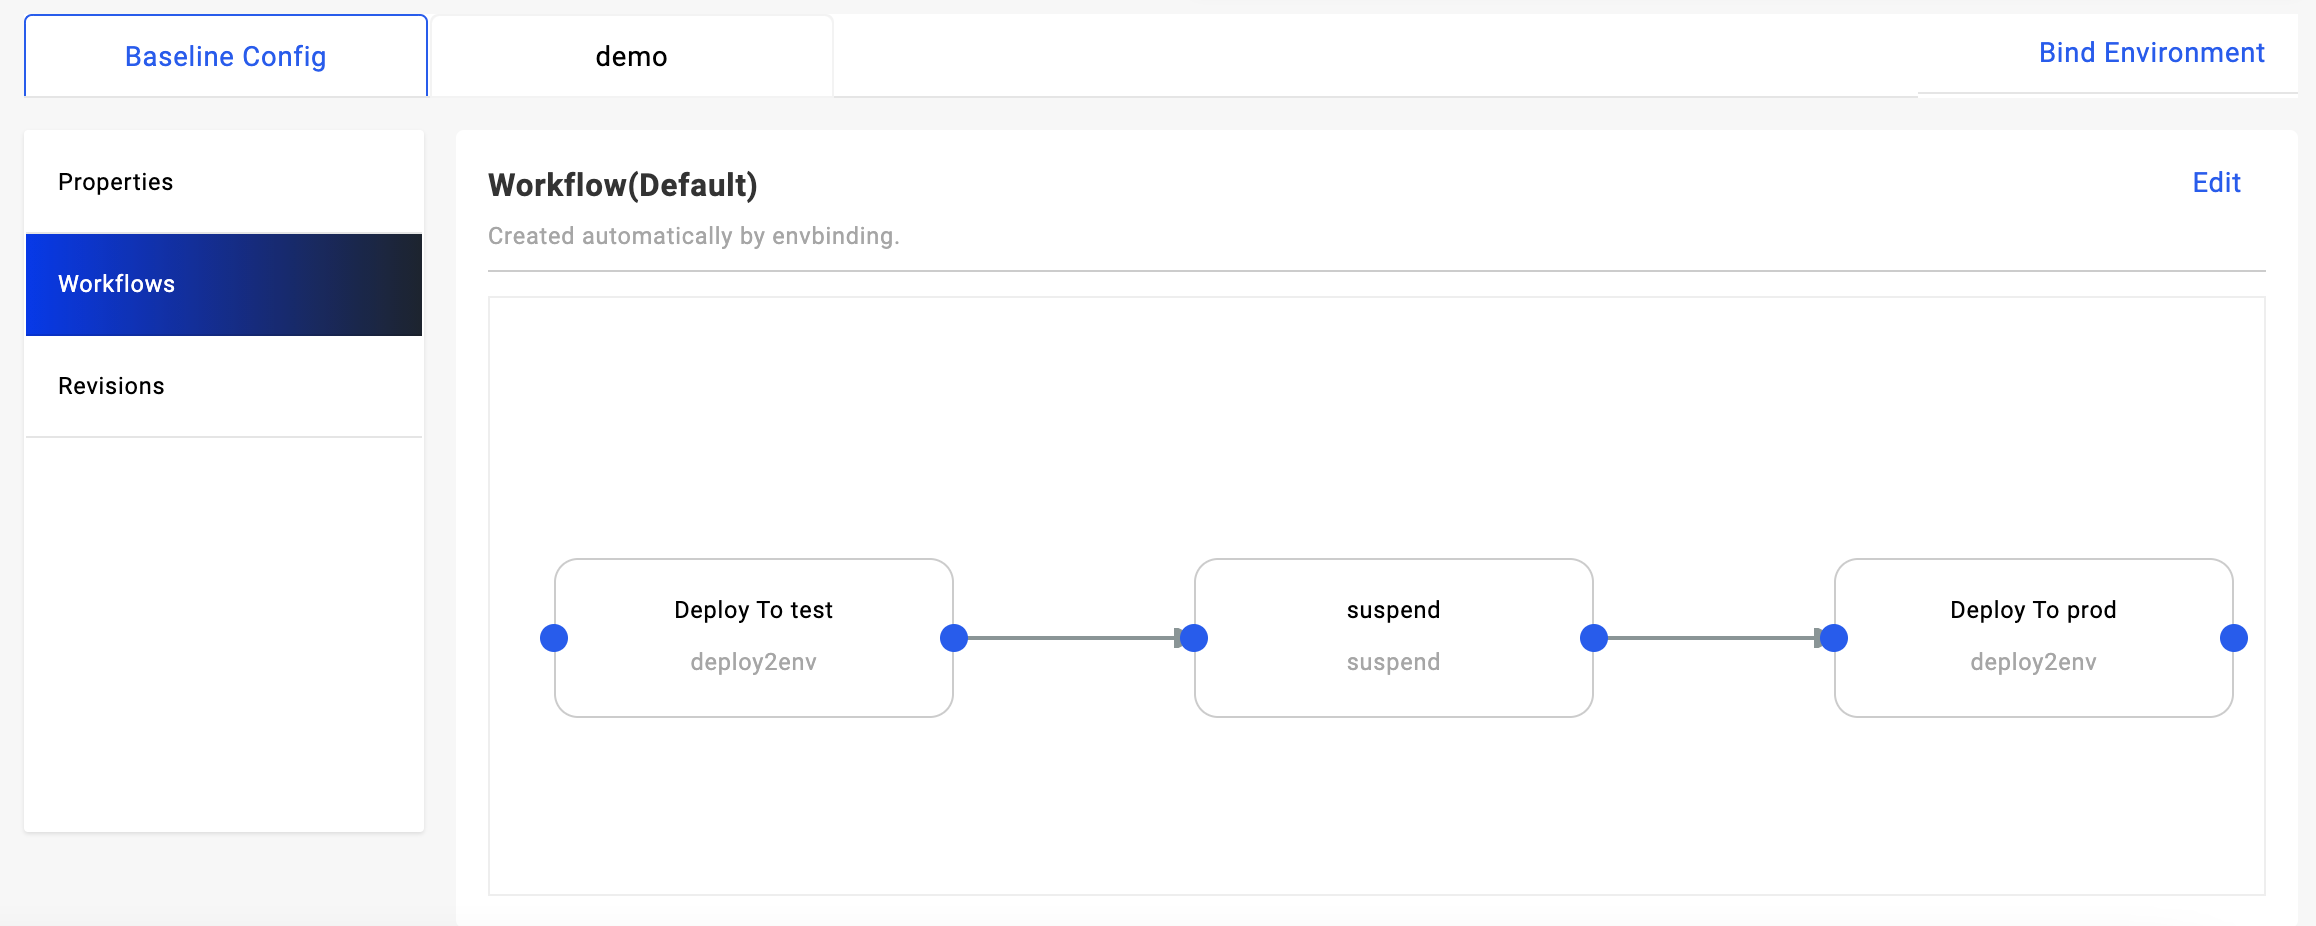
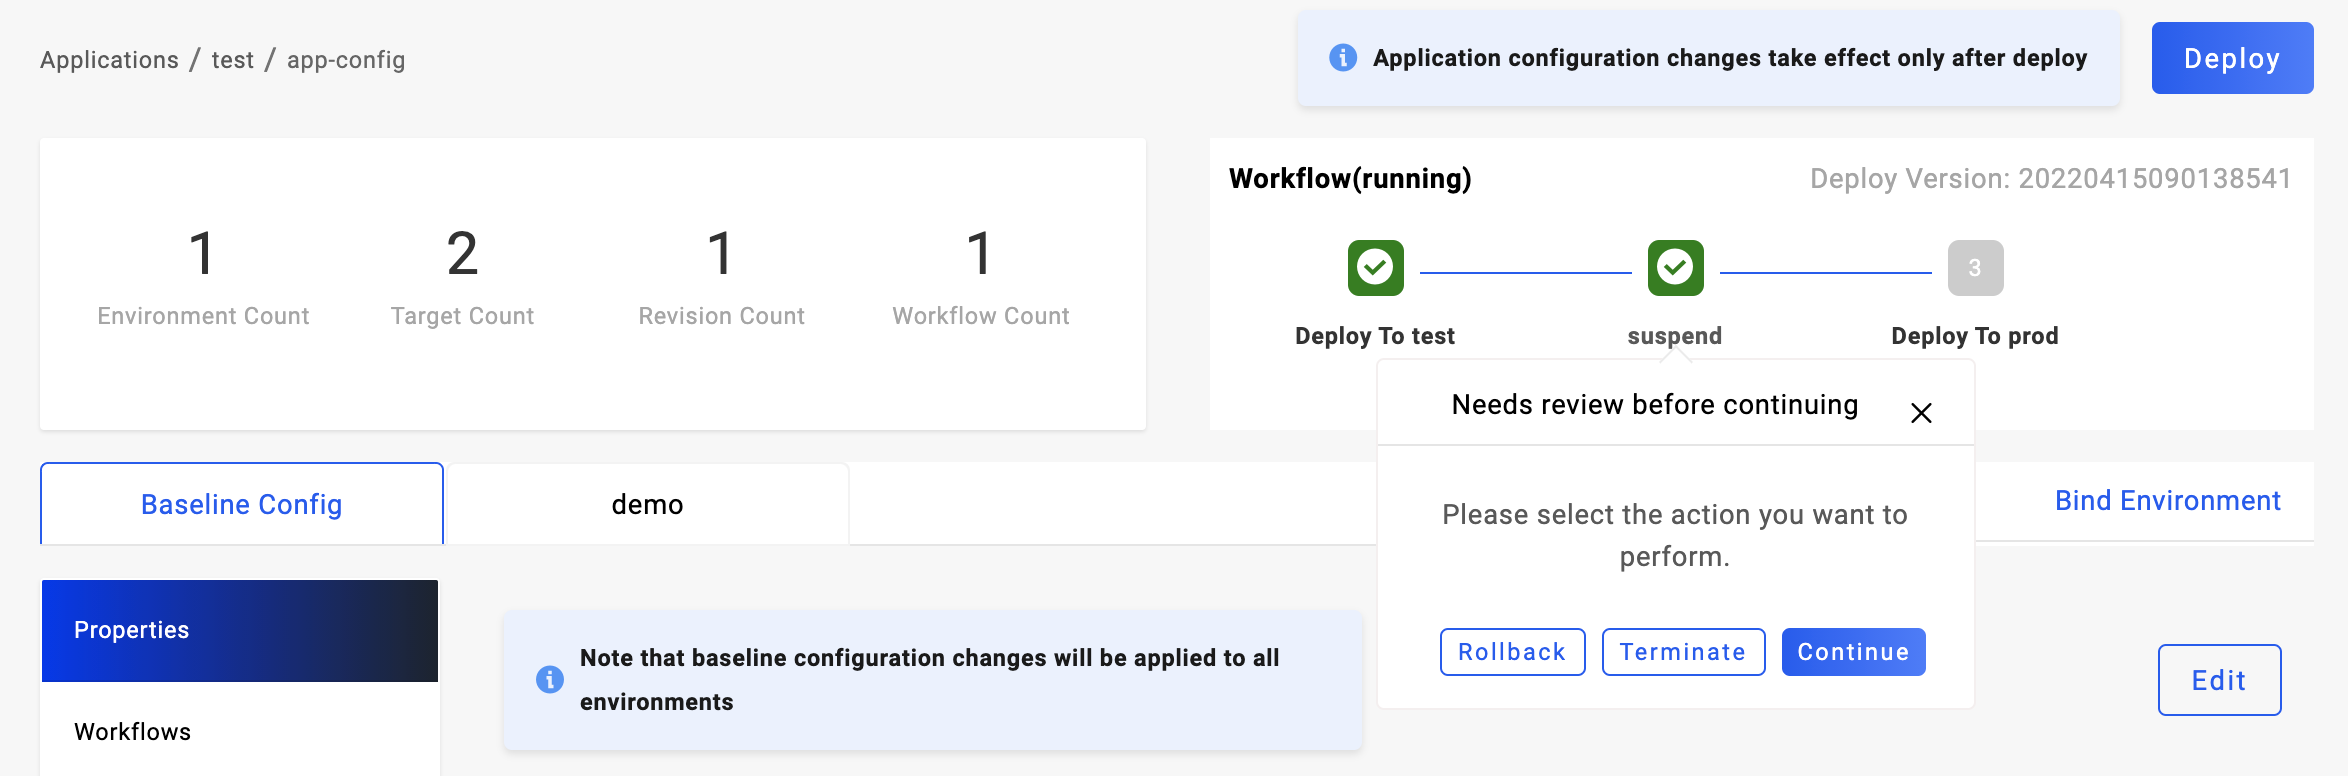
After the application is created, the application comes with a workflow by default, which will automatically deploy the application to two delivery targets. But we don't want the un-debugged app to be deployed directly to production target. So let's edit this default workflow: add a suspend step between the two deploy steps. In this way, after deploying to the test environment, we can suspend the workflow, wait for the user to debug and verify, and then continue to deploy to the production environment.
After completing these configurations, let's add a Nocalhost Trait for this application for cloud debugging.
We'll introduce a few parameters in Nocalhost Trait here in detail:
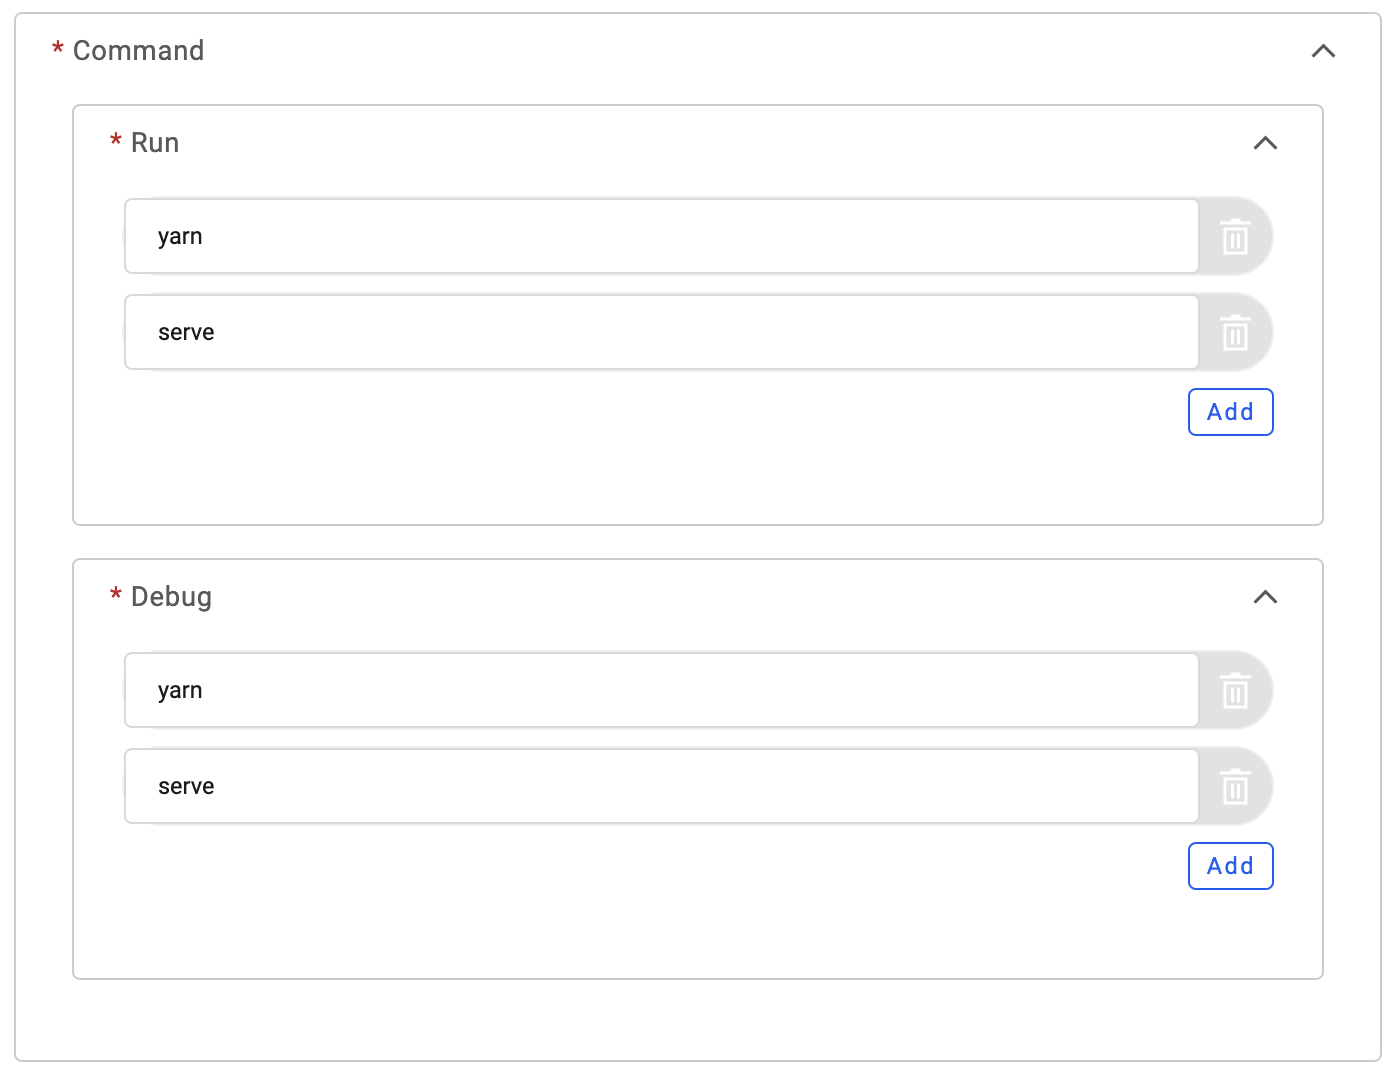
There's two types of commands, Debug and Run. During development, right-clicking Remote Debug and Remote Run on the plug-in will run the corresponding command in the remote Pod. We are using a front-end application here, so set the command to yarn serve.
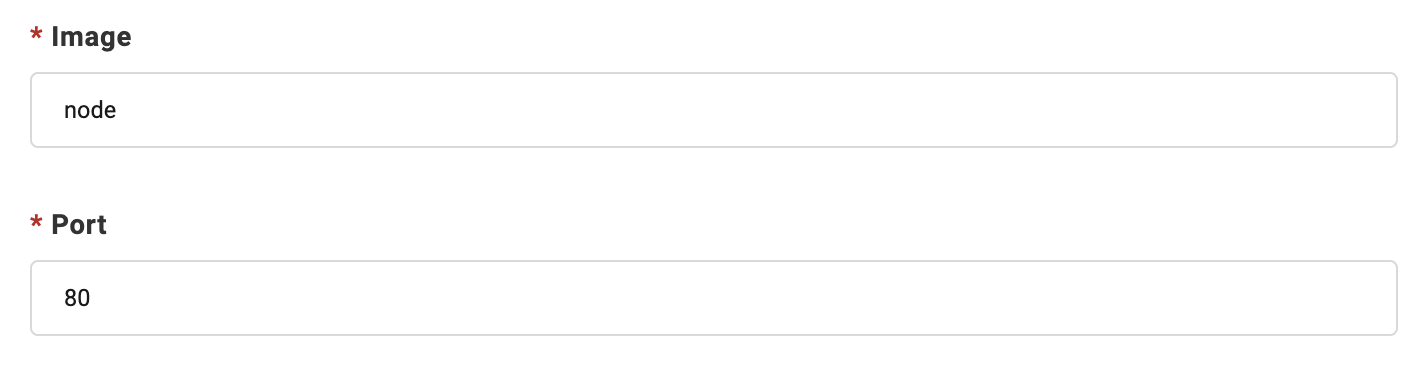
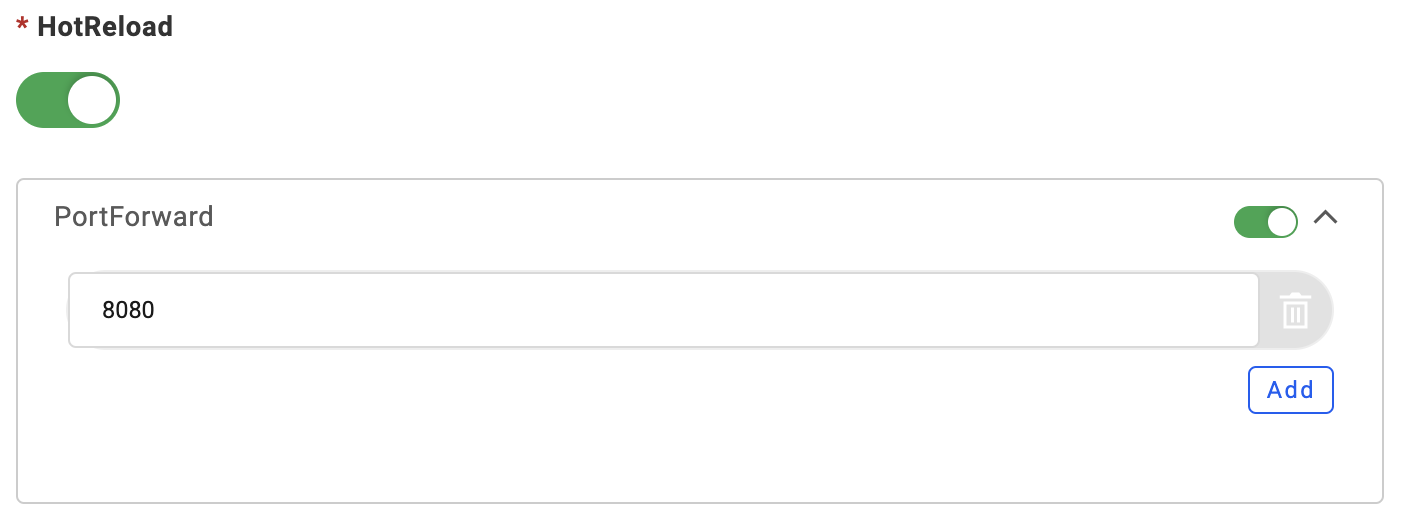
Image here refers to the debug image. Nocalhost provides images in five languages by default (go/java/python/ruby/node). You can use the built-in image by filling in the language name, you can also fill in the full image name to use custom image. Turning on HotReload means turning on the hot reload capability, and you can see the effect directly after modifying the code. PortForward will forward the cloud application's port 80 to the local port 8080.
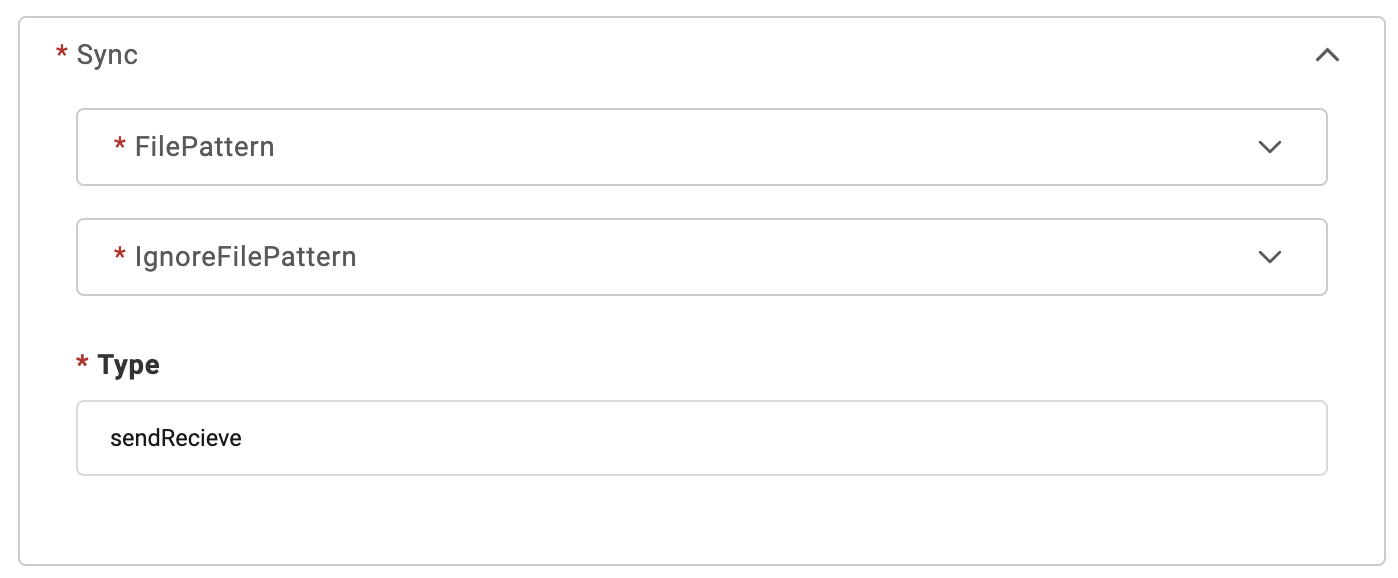
In the Sync section, you can set type to sendReceive (two-way sync), or set to send (one-way send). After completing the configuration, deploy the app. As you can see, the application will automatically suspend after it is deployed to the test target.
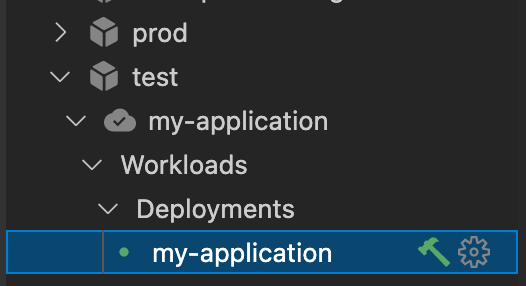
At this point, open the Nocalhost plugin in VSCode or Jetbrains IDE, you can see our deployed application under the test namespace, click the hammer button next to the application to enter the debug mode:
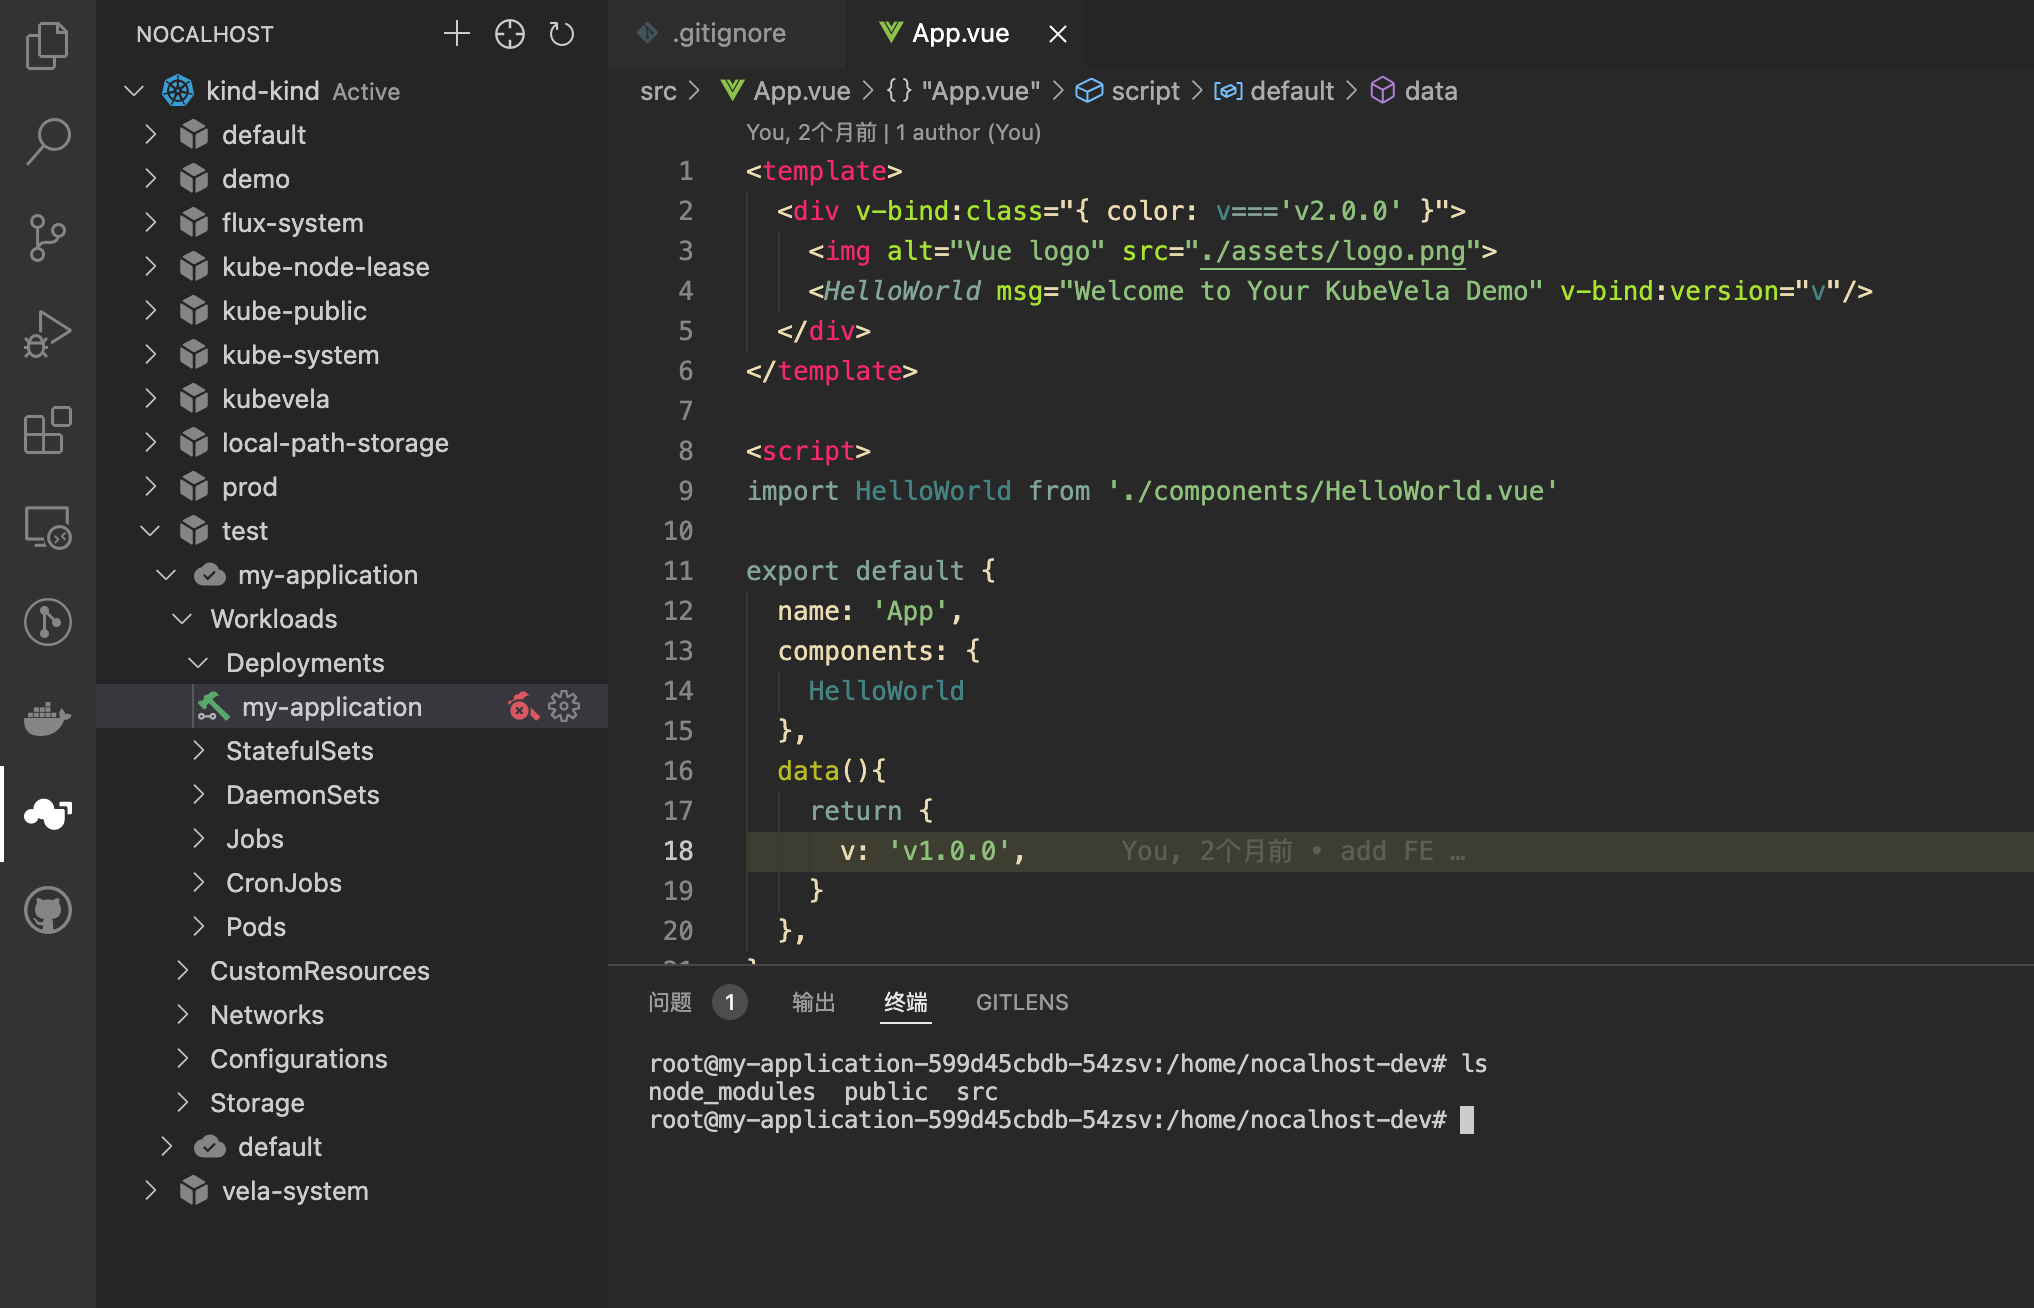
After entering Nocalhost debug mode, you can see that the terminal in the IDE has been replaced by the terminal of the container. With the ls command, you can see all the files in the container.
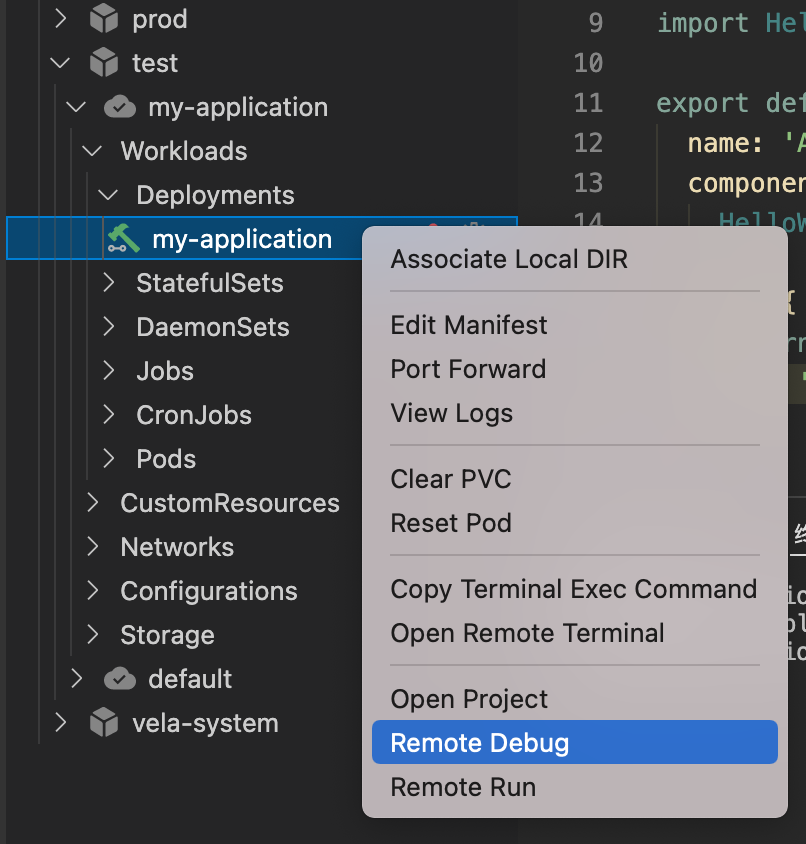
Right-click the application in Nocalhost, and you can choose to enter Remote Debug or Remote Run mode. These two keys will automatically execute the Debug and Run commands we configured earlier.
After entering Debug mode, we can see that our cloud application is forwarded to the local port 8080:
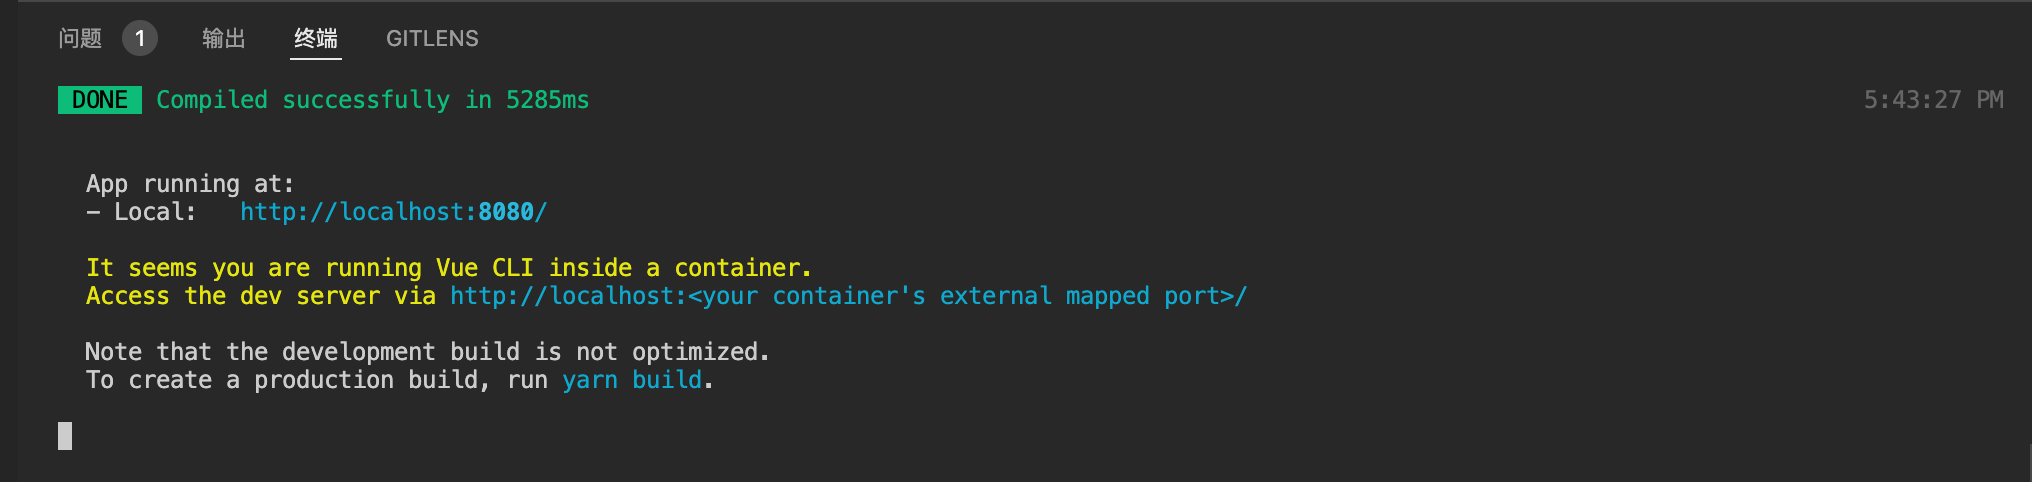
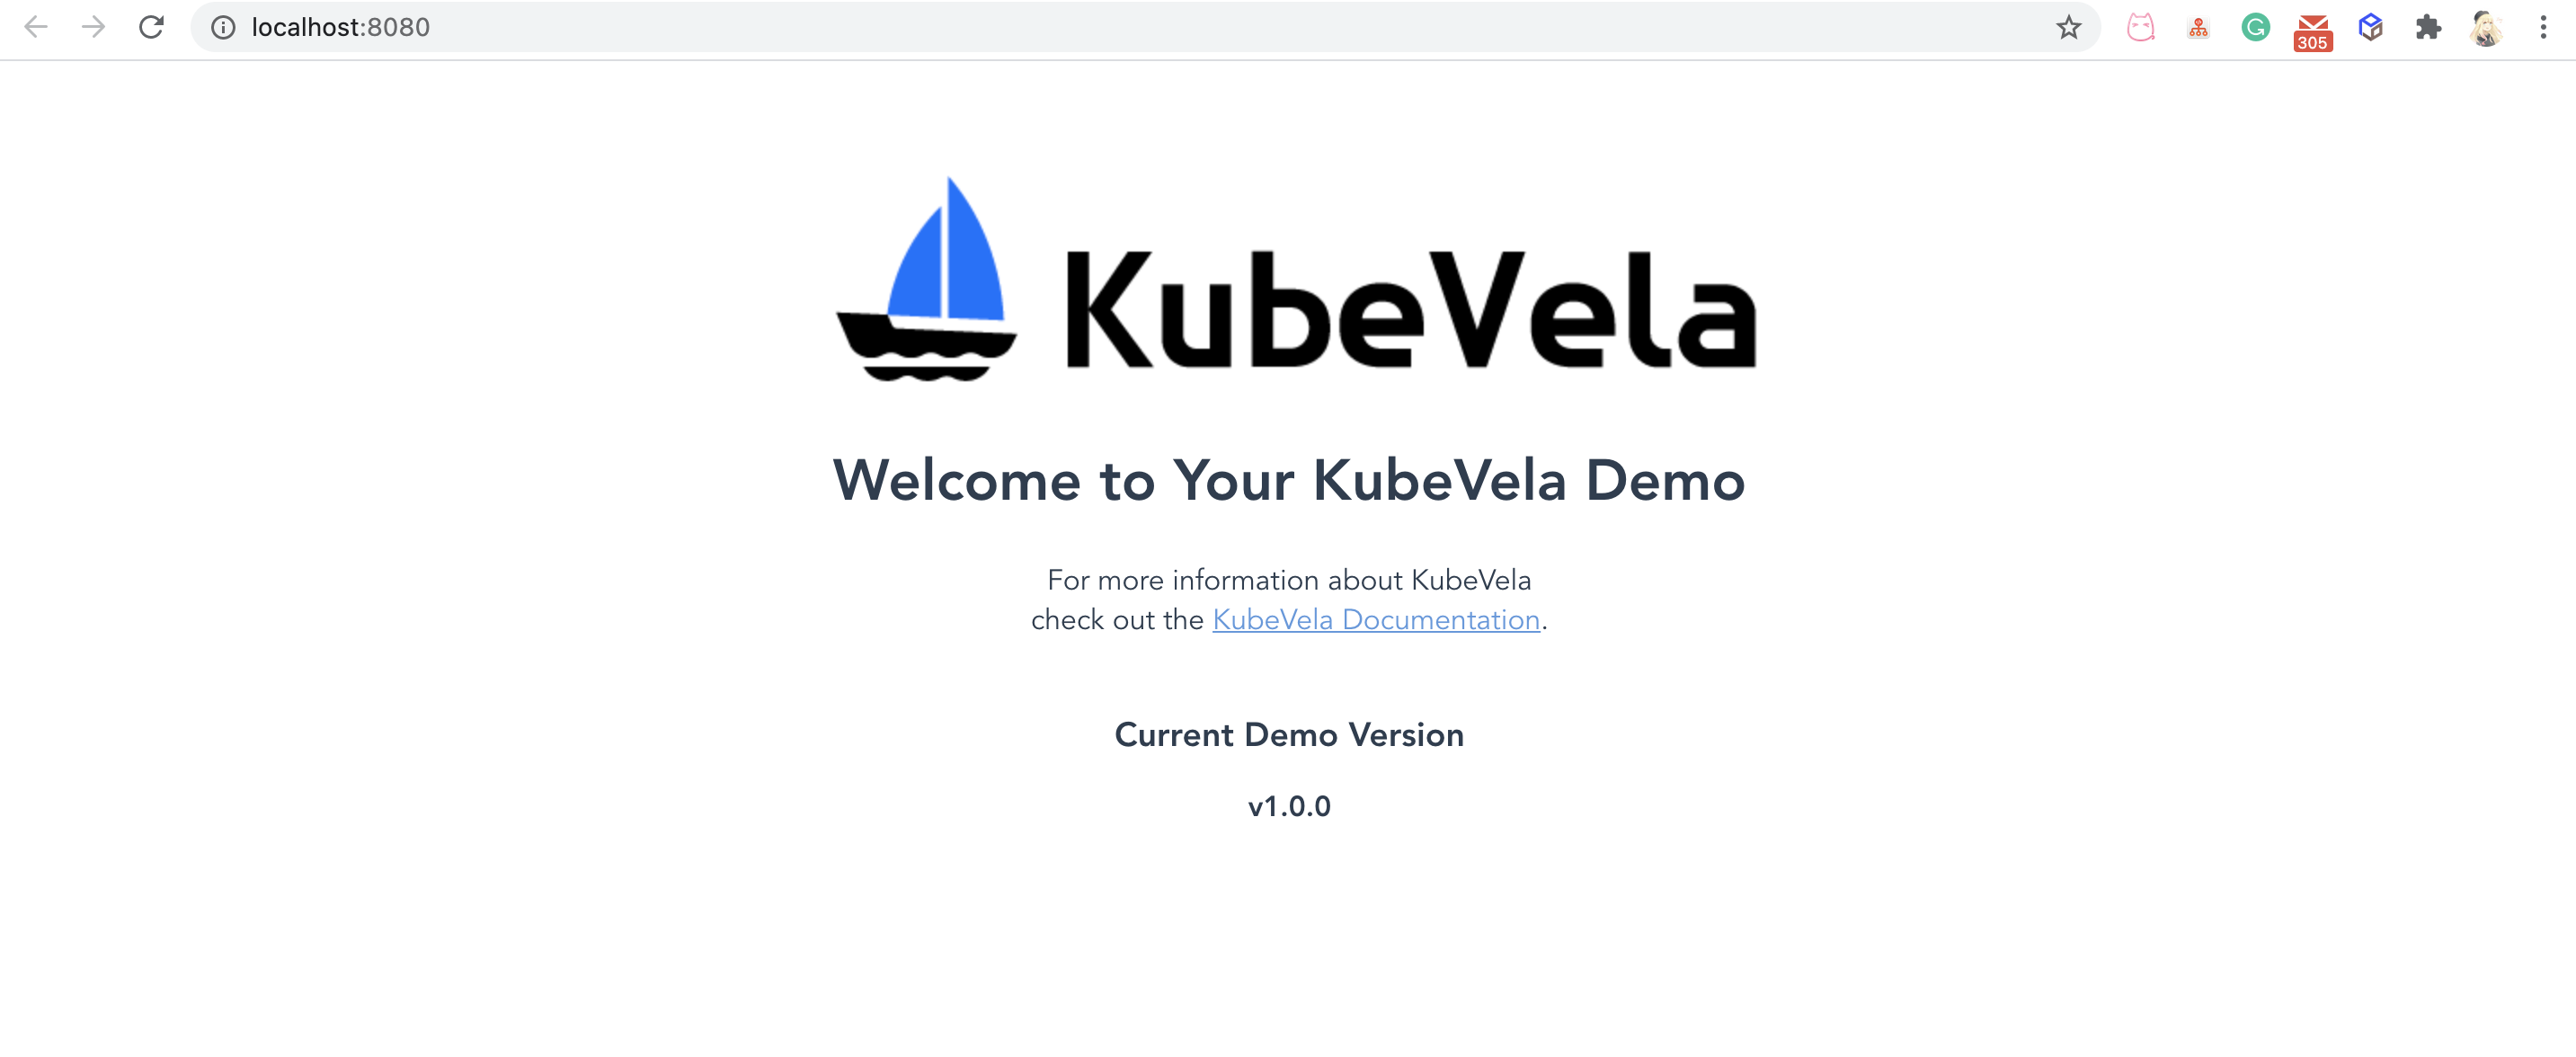
Open the local browser and you can see that the version of the front-end application we are currently deploying is v1.0.0:
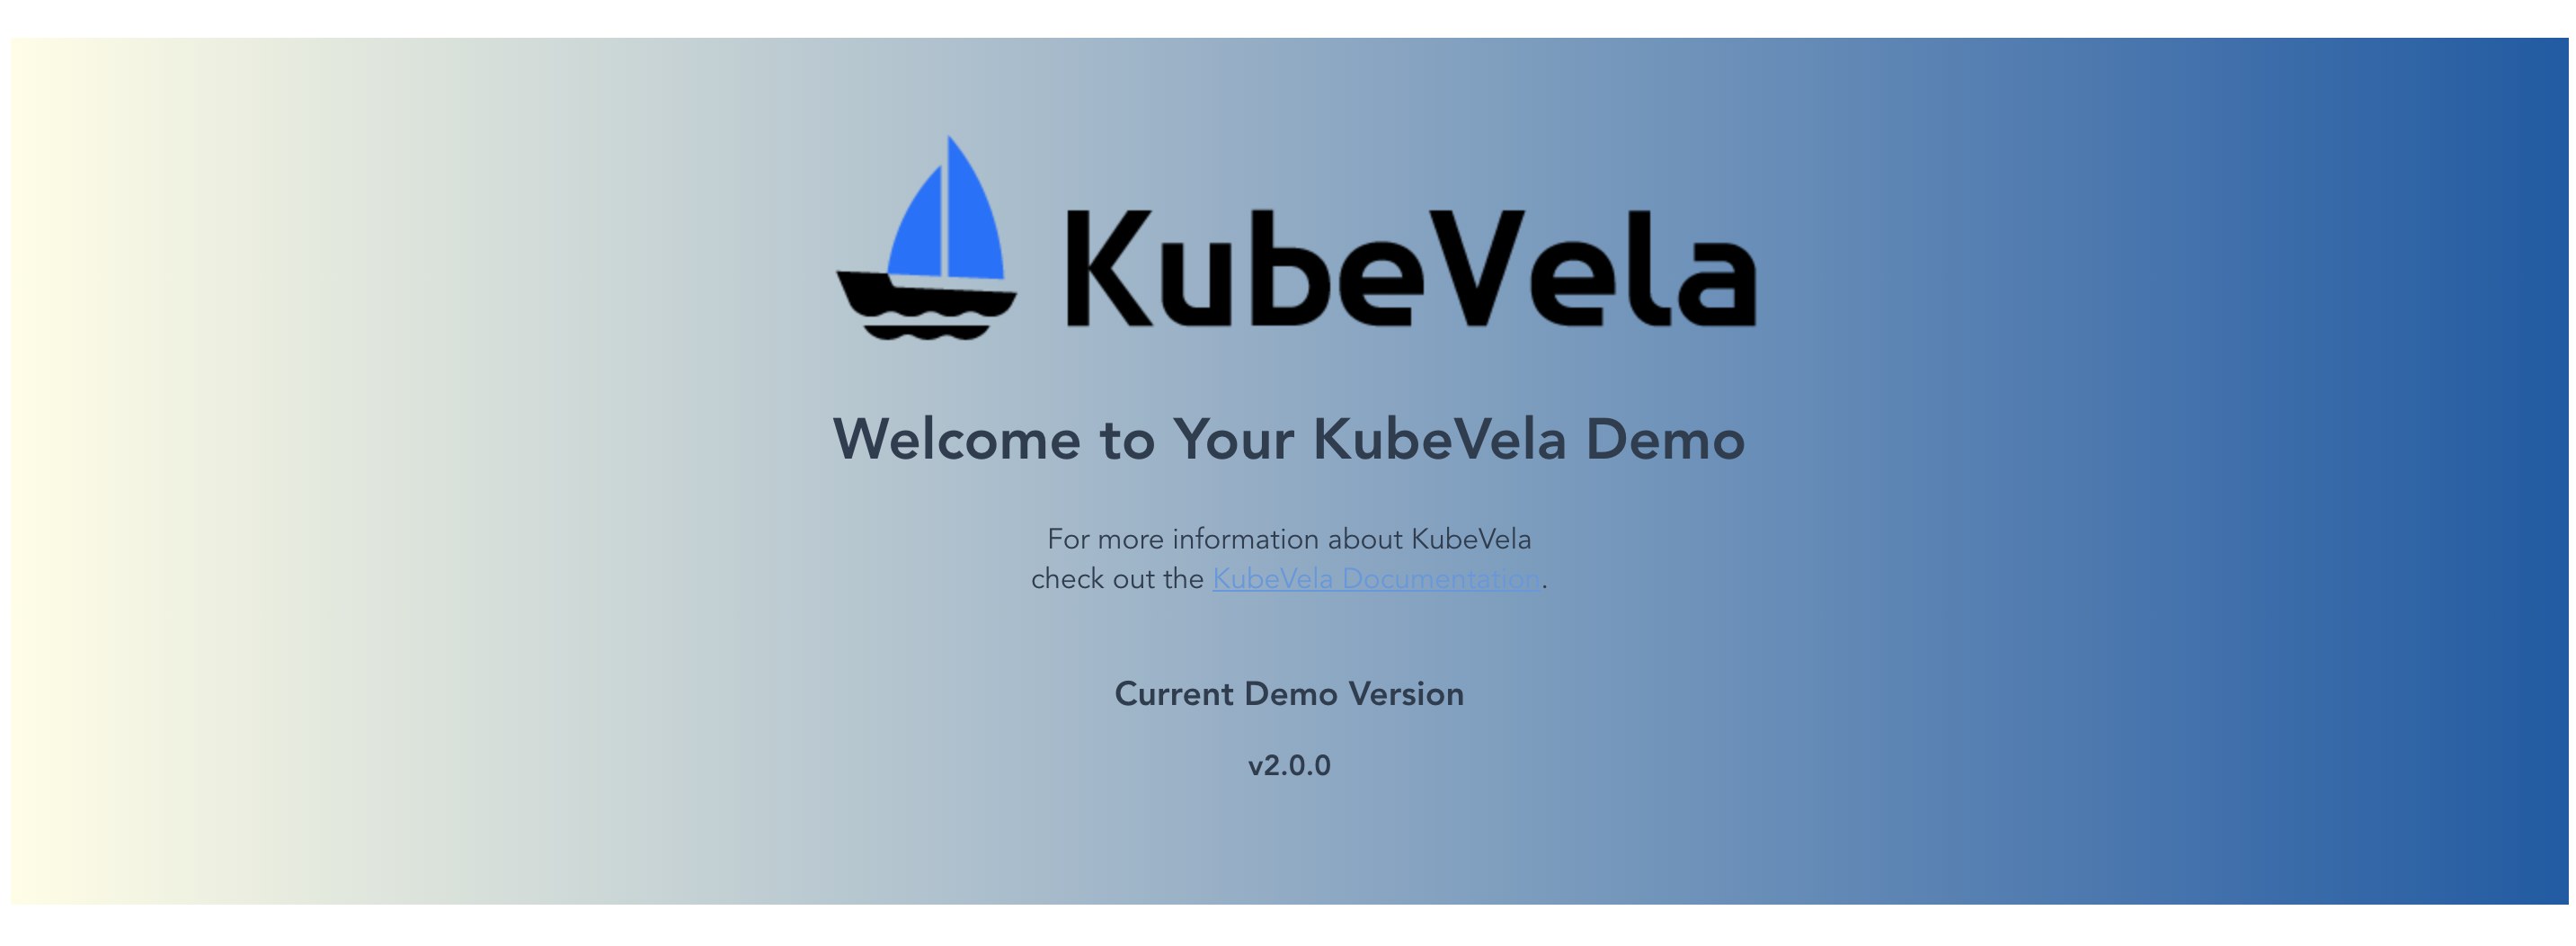
Now, we can modify the code in the local IDE to change the version to v2.0.0:
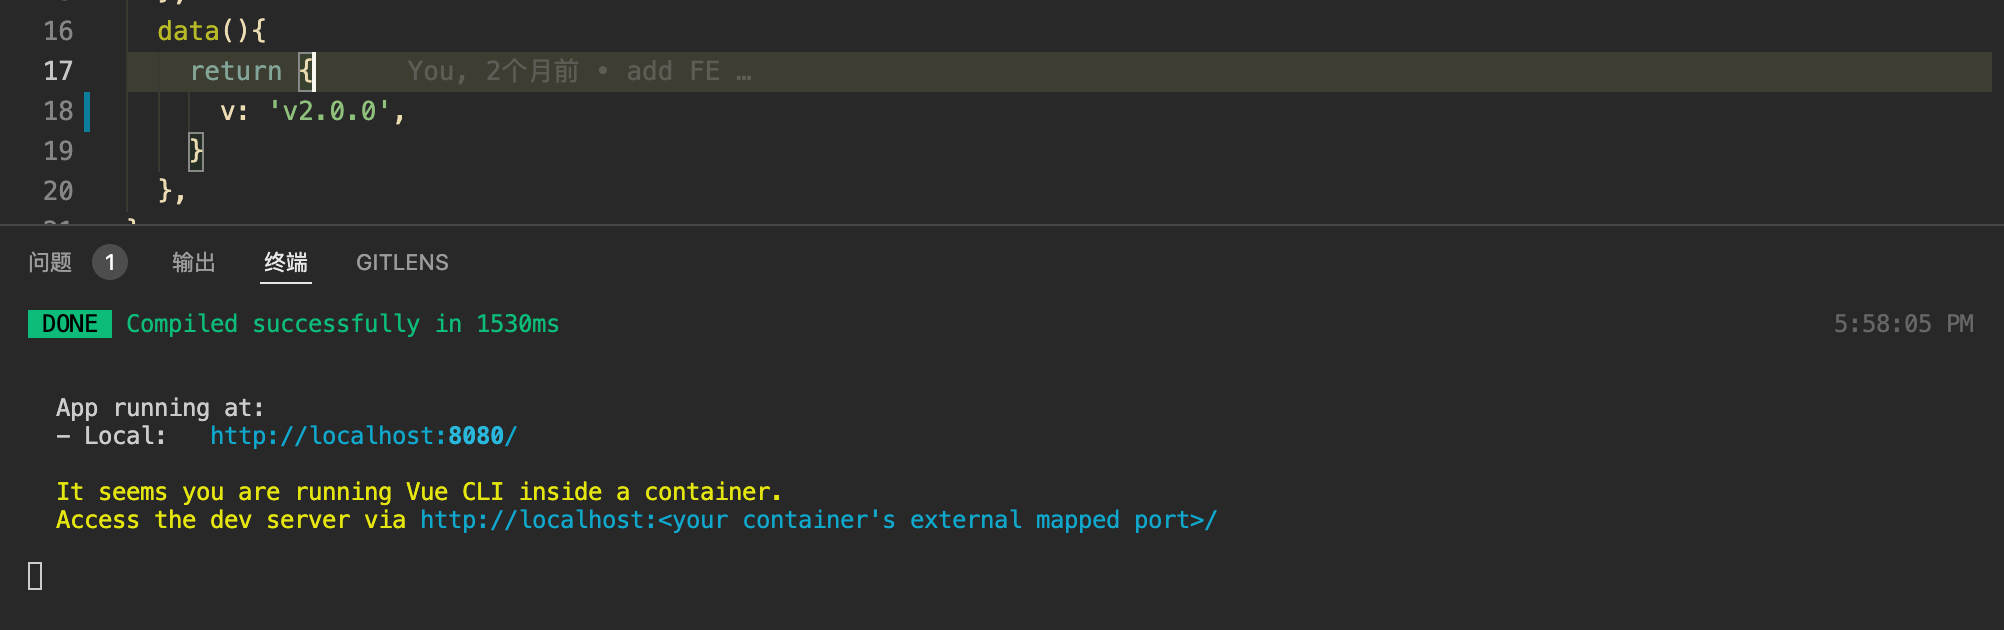
In the previous Nocalhost configuration, we have enabled hot reloading. Therefore, if we refresh the local 8080 port page again, we can see that the application version has become v2.0.0:

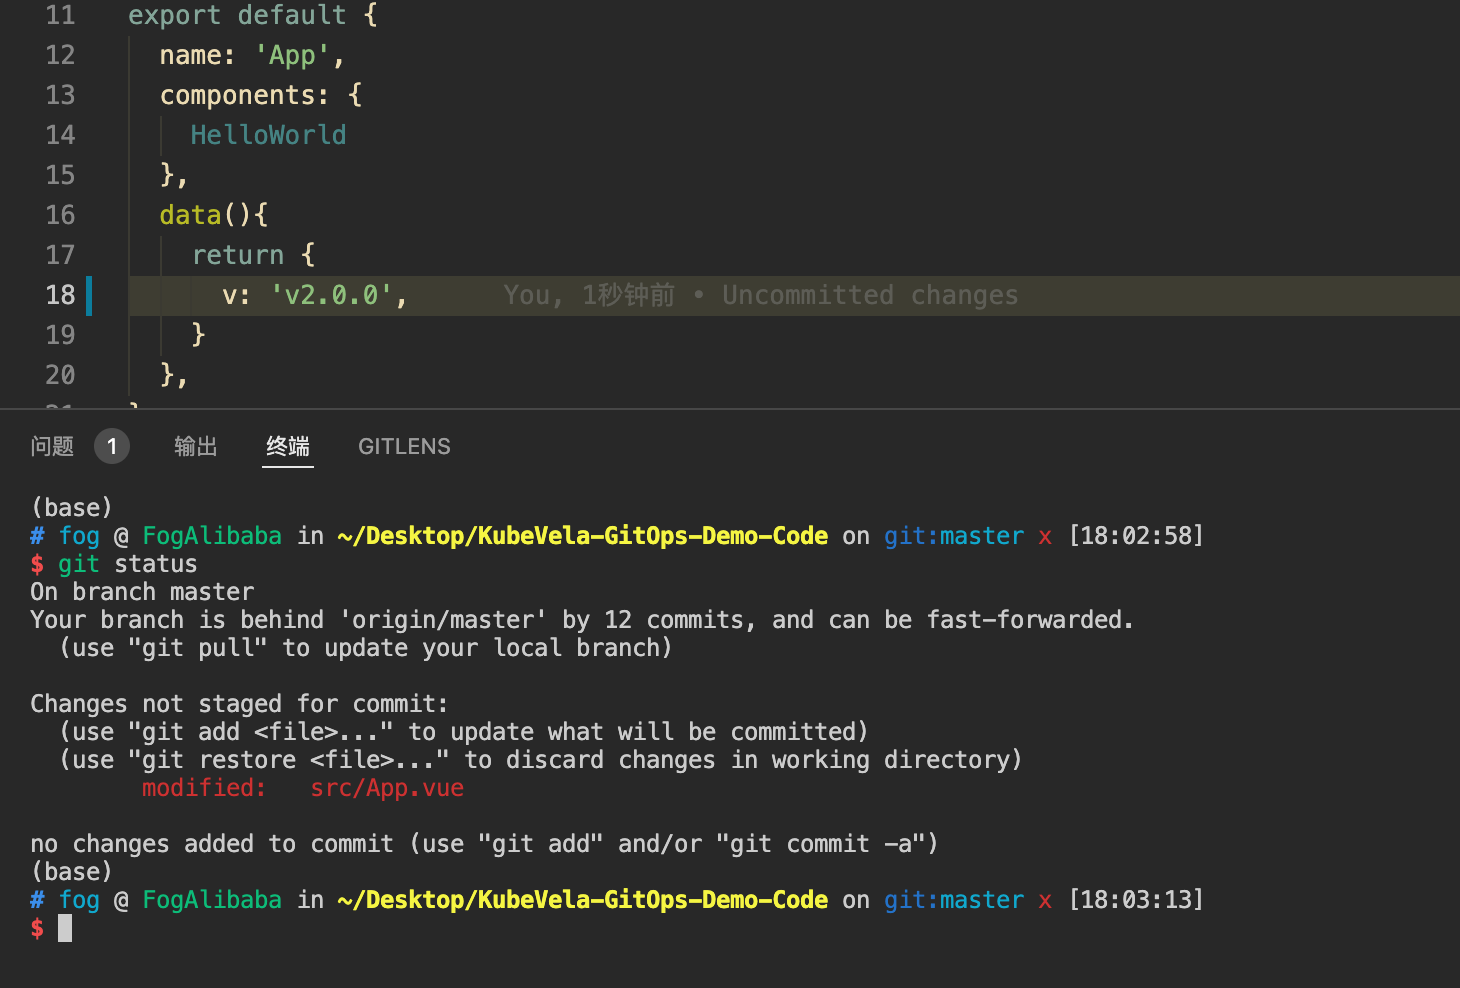
Now, we can terminate Nocalhost's debug mode and push the debugged code to the code repository.
Multi-Environment Publishing with GitOps
After we finish debugging, the application on the environment is still the previous v1.0.0 version. So, what is the way to update the applications in the environment?
During the entire cloud debugging process, we only modify the source code. Therefore, we can use the GitOps to use code as the update source to complete the update of the application in the environment.
Looking at the applications deployed in VelaUX, you can see that each application will have a default Trigger:
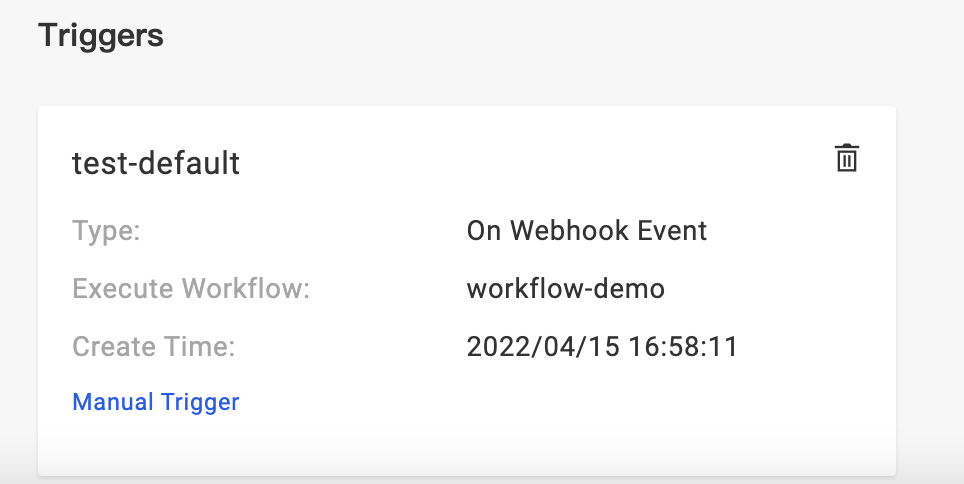
Click Manual Trigger to view the details, you can see that VelaUX provides a Webhook URL for each application, request this address, and bring the fields that need to be updated (such as: image, etc.), the the application can be easily and quickly updated. (Note: Since we need to expose addresses externally, you need to use LoadBalancer or other methods to expose VelaUX services when deploying VelaUX).
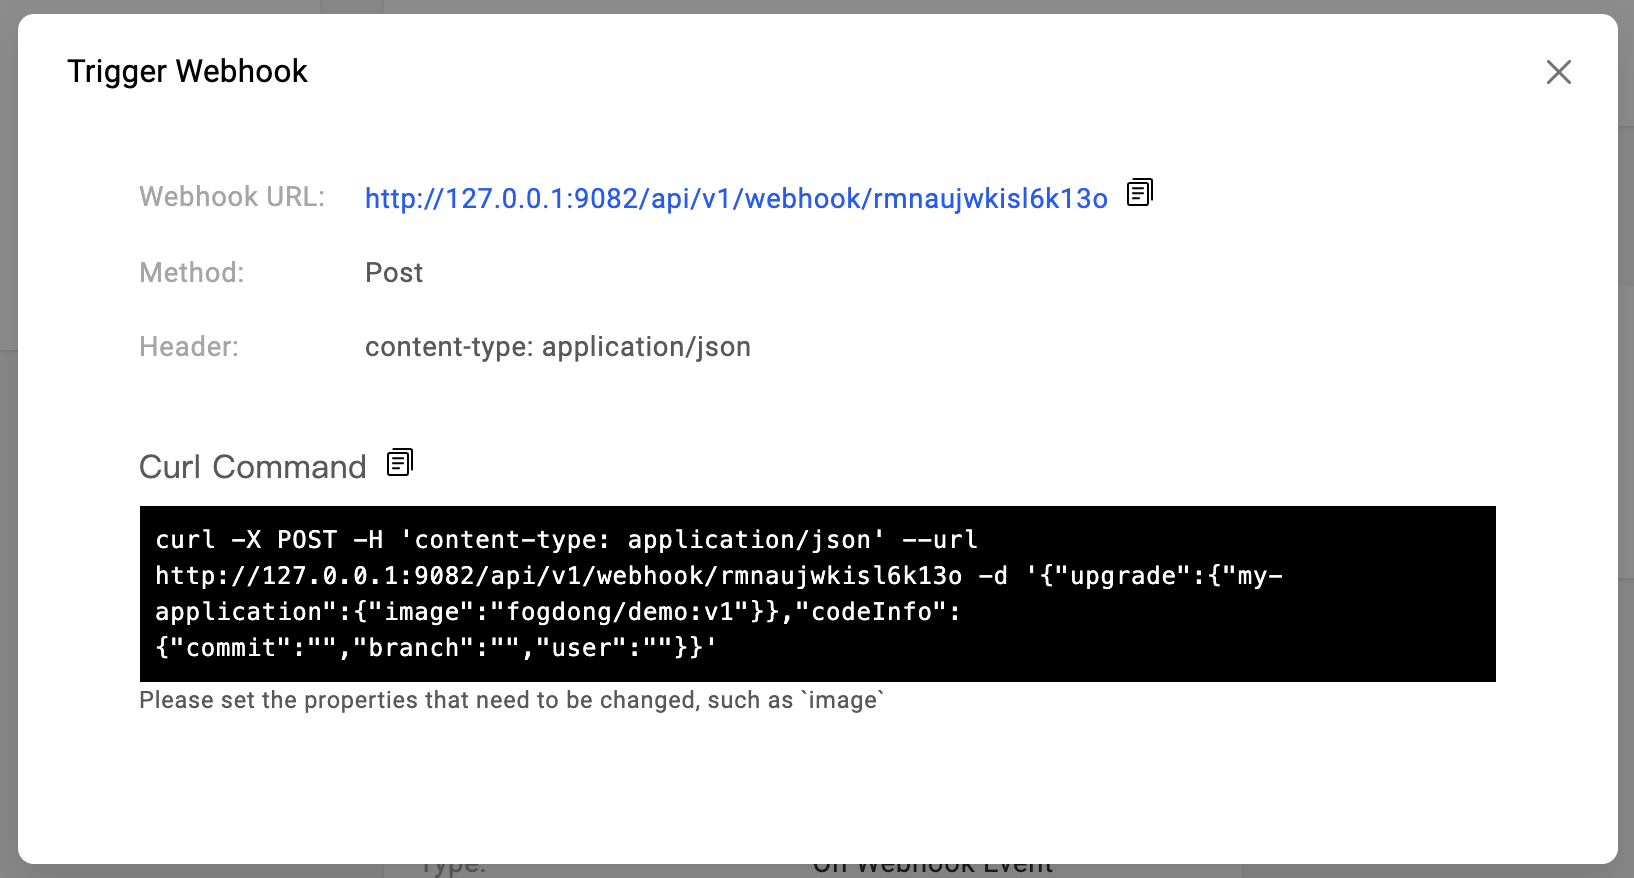
In Curl Command, an example is also provided. Let's parse the request body in detail:
{
  // Required, the update information triggered this time
  "upgrade": {
    // Application name is the key
    "<application-name>": {
      // The value that needs to be updated, the content here will be patched to the application
      "image": "<image-name>"
    }
  },
  // Optional, the code information carried in this trigger
  "codeInfo": {
    "commit": "<commit-id>",
    "branch": "<branch>",
    "user": "<user>",
  }
}
upgrade is the update information to be carried in this trigger, in <application-name is the value that needs to be patched. The default recommendation is to update the image, or you can extend the fields here to update other properties of the application.
codeInfo is code information, which can be optionally carried, such as commit ID, branch, committer, etc. Generally, these values can be specified by using variable substitution in the CI system.
When our updated code is merged into the code repository, we can add a new step in CI to integrated with VelaUX in the code repository. Taking GitLab CI as an example, the following steps can be added:
webhook-request:
  stage: request
  before_script:
    - apk add --update curl && rm -rf /var/cache/apk/*
  script:
    - |
      curl -X POST -H "Content-Type: application/json" -d '{"upgrade":{"'"$APP_NAME"'":{"image":"'"$BUILD_IMAGE"'"}},"codeInfo":{"user":"'"$CI_COMMIT_AUTHOR"'","commit":"'"$CI_COMMIT_SHA"'","branch":"'"$CI_COMMIT_BRANCH"'"}}' $WEBHOOK_URL
After the configuration is complete, when the code is updated, the CI will be automatically triggered and the corresponding application in VelaUX will be updated.
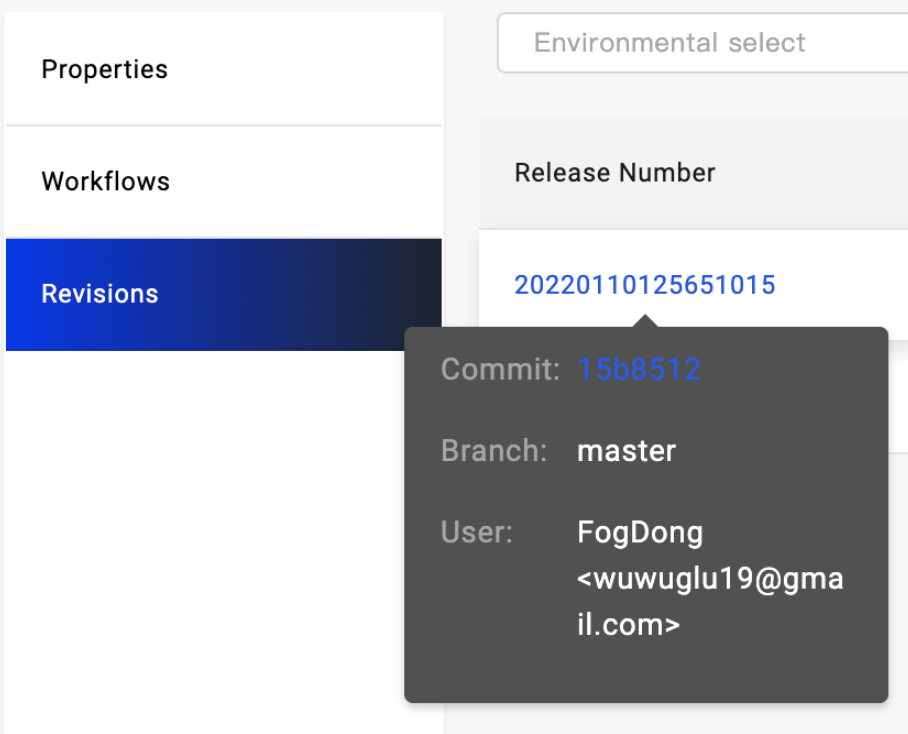
When the image is updated, check the application page again, and you can see that the application in the test environment has become the version v2.0.0.
After verification in the test delivery target, we can click Continue in the workflow to deploy the latest version of the application to the production delivery target.

Check the application in the production environment, you can see that the latest v2.0.0 version is already in the production environment:
At this point, we first used Nocalhost in the test environment for cloud debugging through KubeVela. After passing the verification, we updated the code, used GitOps to complete the deployment update, and continued to update the application in the production environment, thus completing an application from deployment to launch.
Summary
Using KubeVela + Nocalhost, it is not only convenient for cloud debugging in the development environment, but also easy to update and deploy to the production environment after the test is completed, making the entire development and process stable and reliable.